Tech Support Tips to Resolve the Windows Command Prompt Error “0x80070005”

If you carry no knowledge about Windows errors, then these errors might appear very critical and tricky to you. Undoubtedly, Windows is one of the finest and most used operating systems, but that doesn’t make it an error-free operating system. Windows errors crop up now and then and cause problems to the users by hindering the Windows operations in some or other way. Thus, it is essential for users to learn the troubleshooting methods for some common errors. In this blog, you will learn how to troubleshoot the “Error: 0x80070005 Access denied: the requested action requires elevated privileges” error.

Understanding the Error

Tech support,

“Error: 0x80070005 Access denied: the requested action requires elevated privileges” may occur in different scenarios, but usually it occurs when you attempt to check your Windows license status. It is an error message that occurs in continuation to the “Windows is not genuine: 0x80070005” error.

Any user on receiving the “Windows is not genuine” error, first checks the Window license status. If a user doesn’t know how to check the license status and approached a tech support engineer, then that engineer will also first check the license status. The simple and easy way of checking the license status is to run the “slmgr.vbs /dlv” command in the Windows command prompt. But, sometimes instead of showing the license status, the command prompt publishes the following error:

“Error: 0x80070005 Access denied: the requested action requires elevated privileges.”

Troubleshooting the Error

Run the Command Prompt as Administ  0x80070005rator

If you read the error message carefully, you will see that it is referring to elevated privileges. The elevated privileges, also known as admin privileges are available only when you run the Command Prompt as Administrator. If you haven’t run the Command Prompt as Administrator, then you will get this error. Thus, if you have faced this error, then first confirm that you have run the Windows Command Prompt as administrator. When you run the Command Prompt as administrator, it becomes the elevated Command Prompt. Only on an elevated Command Prompt, you can get the elevated privileges (admin rights).

However, if you are already using the elevated Command Prompt, and yet the error is cropping up, then you can try the following troubleshooting methods:

Method 1: Disable Plug & Play policy

  • Click the ‘Start’ button to launch the ‘Start’ menu.
  • In the menu search box type ‘CMD.’
  • In the search result, right-click on CMD.
  • Then, select ‘Run as Administrator.’
  • That will open the Windows Command Prompt (CMD).
  • In the CMD type “rsop.msc,” and then press ‘Enter.’
  • In the next Window, click on ‘Computer Configuration’ to expand it.
  • Then, click on ‘Windows settings’ to expand it.
  • Next, click on ‘System Services’ to expand it.
  • In this screen, locate ‘Plug and Play.’
  • Now, double-click on it and set it to ‘Not Defined.’
  • Once again go to the CMD, and type “gpupdate /force.”
  • Next, restart your computer.

Method 2: Reset your Network Hardware

0x80070005

You can also attempt to resolve the error by resetting your Network hardware. For that, you need a strong Internet connection.

Following are the steps you can follow to reset your network hardware:

  • Go to ‘Control Panel.’
  • Then, locate ‘Network and Sharing Center.’
  • Now, select ‘Change Adapter Settings’ from the left pane.
  • Now, right-click on ‘Local Area Connection.’
  • Then, click on ‘Disable.’
  • Next, right-click on the ‘Wireless Network’ icon.
  • Again click on ‘Disable.’
  • Now, restart your computer.
  • Again go to the ‘Network and Sharing Center’ from ‘Control Panel.’
  • Then, go to ‘Change Adapter Settings.’
  • Next, enable both the adapters that you have previously disabled
  • Then, exit from ‘Network and Sharing Center.’
  • Now, open Windows Update.
  • Then, click on ‘Check for Updates.’
  • Then, click on ‘Optional Updates.’
  • Then, select the available ‘Hardware Driver Updates.’

Then, visit the Network Adapter / Motherboard manufacturer website to download and install latest Network adapter drivers. After you complete updating the drivers, type “slmgr.vbs /dlv” in the Command Prompt. This time you should be able to see your Windows license status.

Conclusion

Resetting network hardware is a difficult task. If you can’t perform the steps on your own, then it is advisable to take help from an online tech support engineer. Sometimes, the error occurs because of missing registry keys. Adding registry keys require the advanced level of technical knowledge. Thus, you should always get the registry tweaks done by well-trained professionals. Therefore, connect with an online computer support firm, and allow a technical support engineer to check the cause of the error. If it is because of missing registry keys, then the computer support expert will add the essential registry keys and repair the error.

Advanced Troubleshooting Tips to Fix the Error Code “0x0000007E”

Windows errors are uncertain, and they might pop up at any point of time while using the computer. You can fix Windows errors on your own with the help of expert technical tips. The error may occur due to many reasons. It’s annoying if you are working on your computer, and all of sudden your computer screen turns into blue or shows you the blue screen stop error code “0x0000007E.”

Blue Screen error is a Windows stop error, and it comes without warning and gives you no clue about how to repair the PC except a long string of letters and numbers. Read the blog to understand “0x0000007E” error and learn helpful tips to fix the issue.

Causes of the Error

  1. This Problem might appear because of a bug in the ‘HTTP’ kernel-mode driver.
  2. Windows will show you the blue screen error if you are using the faulty hard drive.
  3. Windows will show you blue screen error if you are using outdated ‘BIOS’ version.

Resolution

Troubleshoot Method One:

Disable ‘Kernel Mode’ authentication with the help of ‘IIS Manager.’

Note: Shut down the machine completely and start ‘Windows’ in the ‘Safe Mode’ with the help of below mentioned tips.


  1. Press the ‘Power button’ to turn on the machine.
  2. Tab ‘F8’ key continuously before the Windows logo appears.
  3. Windows will show you some instructions like ‘Window Advance Boot Option’ or repair your computer.
  4. Use ‘DOWN’ arrow Key from the keyboard and highlight the option ‘Safe Mode.’
  5. Hit the ‘Enter’ key from the keyboard.
  6. Windows will start in ‘Safe Mode.’
  7. Click the ‘Start button.’
  8. Press the ‘Windows’ key and the letter ‘R’ key together to open the ‘Run’ dialog box.
  9. Type ‘inetmgr’ in ‘Run’ dialog box.
  10. Click ‘OK.’
  11. Expand the server name in ‘IIS Manger.’
  12. Expand the ‘Web sites.’
  13. Then, click the ‘Website’ that you want to change.
  14. Double-click ‘Authentication.’
  15. Click ‘Windows Authentication’ to highlight.
  16. Then click ‘Advanced Settings’ in the action pane.
  17. Click to clear the ‘Enable Kernel-mode authentication’ box.

You must restart the ‘HTTP’ service after disabling the kernel mode authentication, and this will stop ‘IIS.’ Now you need to run the following commands in the command prompt window.

  1. “NET STOP HTTP.”
  2. “NET START HTTP.”
  3. “IISRESET /START.”


Now check whether the problem has got fixed or not. If not then follow the troubleshooting method two to fix the problem.

Troubleshoot Method Two:

You can also fix the problem with the help of ‘Hotfix’ utility. Follow the below guidelines to download the utility or you can call a leading computer support company for online technical support. Online tech support technicians will help you in downloading the program and fixing the problem through the secure remote connection.

  1. Go online and search for ‘Microsoft’ official website.
  2. Download the (Error 0x0000007E Windows 7 Causes Blue Screen) repair utility.
  3. Go ahead and install the software manually.
  4. Press the ‘Scan’ button to find the errors.
  5. Hit the’ Fix Errors’ button after completing the scan.
  6. Reboot your computer.

Hotfix might have fixed the problem that you are facing. If the problem persists, then system restore will be the best option you can try to fix the problem. If you have any important data on your system that you don’t want to lose then, it’s advisable to call computer support companies to fix such complex issues.

Troubleshoot Method Three: System Restore

  1. Click the ‘Start button.’
  2. Type ‘rstrui.exe’ in the search box
  3. Press ‘Enter.’
  4. Click on the ‘System Restore’ button.
  5. Click on the ‘Next button.’
  6. Choose the ‘Restore point’ from the list.
  1. Click on the ‘Next button.’
  2. Click on the ‘Finish button.’
  3. Click on ‘Yes’ to confirm.
  4. Click the ‘Close’ button after computer has restarted.

Conclusion

“0x0000007E” blue screen error may occur due to many reasons and you need to fix the blue screen error very carefully. Blue screen error requires advanced technical knowledge. If you are to fix the problem with the help of above mentioned tech support tips, then it’s advisable to call online technical support firms to fix the problem.

How to Troubleshoot the Stop Error Code “0x00000050”?

A computer is a complex electronic machine comprising many advanced software and hardware equipments. It runs using Windows or any other OS version and thus might show you the errors at any point in time. Windows errors are uncertain, and they may spoil your entire pleasurable mood while working. Windows troubleshooting is not a difficult task, but you will require advanced computer tips to fix the problem. Read the blog to know how to fix the “0x00000050” blue screen error.

Blue screen error can occur because of both hardware and software-related issues. The error might occur after updating your Windows services or might occur when you update or install an antivirus or security program. Windows will show you the error if there is a problem with registry files or display drivers. You can repair the problem on your own by using below mentioned troubleshooting steps, or you can contact any computer support firm for online technical support.

Causes of the Problem

Stop error code “0x00000050” might pop up on your Windows screen due to multiple reasons.

Following are the few common causes of this error:


  • Windows will show you the error if there are issues with Windows registry files.
  • The error may appear if the ‘DLL files’ are not incompatible.
  • The error might occur when you update or install your Windows security program.
  • Windows will show you the error if there is an issue with RAM.
  • Corrupt system files
  • Overheating of your computer’s components.
  • Viruses and spyware.


It is advisable to fix the error code “0x00000050” as soon as possible. Blue screen errors are fatal errors and can lead serious problem to your system. It might lead to system crash. If you are good in Windows troubleshooting, then you can try to fix the problem with the help of below mention steps. If you have any important data in your computer like pictures, files, folders or documents that you don’t want to lose. Then, it’s better to call a reputed computer support company for online technical support to fix the problem.

Resolution

Troubleshoot Method One:

You might face the error if you just installed or updated the security software and you got a blue screen error.


  • Start your computer in ‘Safe Mode’ with the help of below mention steps.


  • Restart your computer.
  • Tap ‘F8’ key while the computer starts.
  • A black screen will appear with some instructions like repair your computer or window advanced boot option.
  • Use ‘Up and Down Arrow’ key from keyboard and highlight ‘Safe Mode.’
  • Press ‘Enter key’ from the keyboard.
  • Computer will start in ‘Safe Mode.’


  • Uninstall the security software.
    • Click ‘Start.’
    • Go to the ‘Control Panel.’
    • Click ‘Programs.’
    • Then click ‘Programs and Features.’
    • Uninstall the security software.
    • Go to the start menu.
    • Type ‘ Windows Update’ in the search box.
    • Hit ‘Enter.’
    • In the left pane, click ‘Check for updates.’
    • Then, wait for a while and allow Windows to look for the latest updates for your computer.
    • If updates are available then click ‘Install Updates.’
    • Restart your computer.


Check whether the problem got fixed or not. If not then, follow the troubleshooting method two to fix the problem.


Troubleshoot Method Two: Updating the Display Adapter Drivers

  1. Start your computer in ‘Safe Mode.’
  2. Type ‘Devmgmt.msc.’ in the search box.
  3. Hit ‘Enter.’
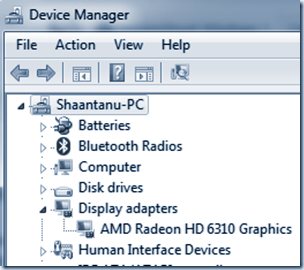
  4. Windows will show you ‘Device manager’ utility.
  5. Expand the Display Adapters section.


  1. Right-click the listed device.
  2. Click on ‘Uninstall.’
  3. Restart your computer again in ‘Safe Mode.’
  4. Again go to ‘Device Manager.’
  5. Click on the ‘Scan for hardware changes button.’
  6. Connect to the Internet, download and install the latest available display drivers by visiting its official OEM’s website.
  7. Restart your computer in normal mode.


Now check whether the problem has got fixed or not. If not then, it might be some serious issue with Windows of your computer. In such situations, it’s advisable to call online technical support companies for quick online tech support. Such problems require advanced troubleshooting.

Conclusion

The blue screen error may occur due to plenty of reasons and some self-help tech support guides can assist you while fixing the same. You can contact expert technicians to handle such complex Windows problems. Experts will employ necessary advance troubleshooting strategies that can fix the error. Online technical support will be one of the best resolutions for such problems.

How to Fix the “The Requested Operation Requires Elevation” Error?

Sometimes, when you try to install a new software on your Windows computer, you might fail in the process because of the error “The requested operation requires elevation.” It is an error of permission that means the error occurs when you as the user don’t have the appropriate permissions to perform the installation process. In this article, you will read more about this error and learn how you can repair it. The Requested Operation Requires Elevation,

As it is a permission error, so the error can occur under a different scenario, and not just during the installation of software programs. You also hold the chances of getting this error while doing Windows configuration alteration, setting modifications, software deployment, commands execution in CMD prompt, software removal, etc.

The repairing method of the error will appear very simple once you will understand its causes. As mentioned above, it is a permission error. So, to get rid of the error, you simply need to have the right permissions. Once you have the right permissions, the error will automatically get repaired.

Cause of the Error

The Requested Operation Requires Elevation

As you can read the error, “the requested operation requires elevation” talks about elevation. Here, elevation means ‘elevated rights.’ Elevated rights also mean admin rights. In Windows Vista, Windows 7 or Windows 8, certain operations are executable only if you have the admin rights. A few such operations are software installation, software removal, commands execution, settings modification, etc. From a normal user account, you can’t perform these operations as these operations are likely to make major modification on your Windows. That is why such modifications are permissible only on an Administrator account.

Troubleshooting the Error

Login from the Administrator Account

If you are attempting to perform these operations from a normal user account, then you need to log into your computer as Administrator and then try performing the operations once again. This time you shouldn’t get the error.

Run the Program as Administrator

However, sometimes just logging into the computer from the administrator account is not enough. In addition to that, you also need to run the program as Administrator. Running a program as Administrator and logging into the computer as Administrator is two different things. Sometimes, to acquire the elevated permissions, you need to perform both the steps.

Disable the UAC (User Account Control)

Sometimes, especially in case of a shared computer, there exists an ‘Admin Group.’ The group includes many users as ‘Admin members.’ These Admin members have some of the admin rights but not all. Till Windows XP, it was possible to repair the error “the requested operation requires elevation” even from an Admin member account.

Tech Support,

But the UAC of Windows Vista and above versions doesn’t consider the admin rights of Admin member as the elevated rights. Thus, if you attempt to perform certain operations from an Admin member account, then also you will get this permission error. In case you are using Windows Vista and above versions, then you strictly need to use the Administrator account.

But, if you want a group of users to have the admin rights, then you have to get the UAC disabled. UAC is the Windows feature that identifies your user type and its respective permissions. A disabled UAC won’t be able to distinguish between an admin member and the ‘Administrator,’ and thus it will not restrict the user with this error.

To disable or turn off the User Access Control (UAC), you can avail online computer support help. Dial a reputed tech support firm and an experienced technical support engineer will be ready 24x 7 to repair the error. However, even to disable the UAC, the tech support engineer will require the admin rights.

Thus, you need to provide the technical support engineer your admin login credentials, and then he or she will execute the following steps to disable the UAC.

  • Click the ‘Start’ menu.
  • Open ‘Control Panel.’
  • Navigate to ‘User Account.’
  • Then, click the link for ‘User Account Control’ settings.
  • In the ‘User Account Control Settings’ dialog box, you will see a control level.
  • Now, drag the control level to ‘Never Notify.’
  • Next, click ‘OK.’
  • That will disable the UAC.

Conclusion

It is a minor error because it doesn’t refer any technical flaw on your computer. Various other errors often result because of hardware issue or software issue, so it is not very tricky to repair the error. All you need is the administrator login credentials. Normally, you should not need any professional computer support to resolve the error. However, if disabling the UAC is appearing difficult to you, then you can go for online tech support help and get the error repaired easily.

Expert Tips to Fix the “0x00000050” Error in Windows 8

Computer problems are quite frustrating, and you can get problem due to various reasons while using it. A majority of the errors never clearly says what is wrong with your Windows PC. It can be difficult to diagnose the problem if you are basic Windows 8 users. There are some common computer issues that every computer user faces such as a slow computer, virus and malware attacks, etc. 0x00000050

Most computer users visit nearby technical support store as soon as they get an error on the screen or any problems on the computer, and never try to find a way to resolve the error on their own. Some error can be diagnosed easily without any help from computer support expert. So, from this Blog, you will get some beneficial expert tips to fix the 0x00000050” error in your Windows 8 PC.

Causes of the Error

  • Windows Registry corrupted due to recent installation or uninstallation of the application.
  • Wrongly configured or corrupted drivers.
  • Driver conflict or damaged system files after you’ve installed an application.
  • Corrupted operating system due to virus or malware infection.


Symptoms of the Error

“0x00000050” error mostly occurs while starting your Windows 8 computer. It occurs in a blue screen before initiating Windows operating system. Sometimes it also blocks users to access the system. Many programs that use same memory cause this error and then fail to run properly. You may get a Stop error on your screen when the error occurs that resembles the following:

STOP 0x00000050 (parameter1, parameter2, parameter3, parameter4)

PAGE_FAULT_IN_NONPAGED_AREA

How to Resolve the Error?computer support

Follow the steps given below to resolve your problems:

Method 1: First you need to make a backup before repair your Windows registry.

  • Go to ‘Start’ menu.
  • And type ‘command,’ then hit ‘Enter.’
  • Click ‘Yes,’ if prompted to allow.
  • Now, type “Regedit.”
  • Then, hit ‘ENTER.’
  • And select the ‘Error 0x50’-related key in the Registry Editor.
  • And choose ‘Export’ from the file menu.
  • Then, select the folder to save the backup file.
  • And, type a name for your backup file.
  • Make sure that ‘Selected Branch’ is selected in the ‘Export Range’ box.
  • Then, click ‘Save.’
  • Now, the file is ‘Saved,’ and you have a backup of your file.


Note: Inappropriate changes made to the ‘Registry Editor’ can cause critical problems that may require you to reinstall Windows operating system. If you are not a learned PC user, then do not edit the Windows registry manually.

Method 2: Windows System Restore.

  • Go to ‘Start’ menu.
  • And, type ‘System Restore.’
  • Then, hit ‘ENTER.’
  • Now, click ‘System Restore’ in the search result.
  • And, type ‘Administrator Passwords.’
  • Then, follow the steps in the Wizard.
  • Now, restore your computer.

Method 3: Run Windows System File CheckerWindows 8

  • Go to ‘Start’ menu.
  • And, type ‘Command’ in the search.
  • Then, hold both key ‘CTRL’ and ‘Shift.’
  • And hit ‘ENTER.’
  • Then, It will ask to continue.
  • Hit, ‘Yes.’
  • Now, you will get a black box.
  • And, type “sfc /can now” in the Black screen, then hit ‘ENTER.’
  • Now, “System File Checker” will start scan for ‘Error.’
  • Then, follow the steps from the screen commands.

Method 4: Install Windows Updates

  • Go to ‘Start’ menu.
  • And, type ‘Update’ in the search box.
  • Then, hit ‘ENTER.’
  • Now, ‘Windows Update’ will appear on the screen.
  • If updates are available, then click ‘Install Updates.’

Conclusion

The error should get resolved after you apply the above troubleshooting methods. If the error persists, then it is the right moment to take help from technical support expert from reputed online computer support companies. Those errors may be severe and rarely occurs on the computer. However, you might also lose valuable data or files from your computer if you don’t fix the error immediately.

How to Fix STOP 0x00000050 Error on Windows NT 4.0?

You use your Windows PC both at your home and office to perform a variety of works related to study, entertainment, official tasks, and others. You rely on your PC for a lot of productivity tasks and never expect it to malfunction, but sometimes you may find your PC malfunctioning. There might be various reasons for that. If you are a long term Windows user, then you might have come across STOP 0x00000050 error. It is a critical error that might stop you from using your PC and thus puts a period on your productivity chart. Computer Support

Once you come across an error, the first thing that you do is to look for a computer technician who can fix the issue by taking the minimum time. Previously, when we had to rely on physical PC repair shops, it used to take many days but things have changed now. Today, you get expert computer support at your fingertip. The advancement of Internet technology brings technical support online, and you can avail it easily to fix your PC.

In this blog post, you will get to learn tips and tricks to fix your PC without using third party technical support if you are facing 0x00000050 error. Knowing the symptoms and causes of the error helps you better understand the troubleshooting tips. So first let us have brief information regarding symptoms of the error.

Common Symptoms of the Error

0x00000050Let us know the situation whefn you come across the problem. You mostly face the error when you remove the TCP/IP protocol on a Windows NT 4.0 system on which you had Service Pack (SP2) earlier. You receive the following error description while you boot up your PC.

“STOP 0x00000050 (0xFF10c004, 0x0, 0x0, 0x0) PAGE_FAULT_IN_NONPAGED_AREA

-or-

STOP 0x00000050 (0xFF404004, 0x0, 0x0, 0x0) PAGE_FAULT_IN_NONPAGED_AREA

-or-

STOP 0x00000050 (0xA0133004, 0x0, 0x0, 0x0) PAGE_FAULT_IN_NONPAGED_AREA”

However, the error statement may change depending on the circumstances but the error code remains same in all three cases. Therefore, you should not get deviated if you see a different statement while going to fix the issue. If you find the same error code, then you must treat it as the same error.

Causes of the Error

There might be several reasons for one error thus you need to conduct a systematic diagnosis to identify the reasons precisely. Sometimes you fail to diagnose the issue properly that makes the troubleshooting difficult and lengthy. So the first important thing is to identify the cause.

You face the above-discussed error primarily if you install Remote Access Service on your PC that is configured to use the TCP/IP protocol. You might have configured the service as either a dial-in or a dial-out protocol.

Resolution

Find below the most helpful workaround to fix the issue:

  • You need to perform one of the following steps to fix the issue.
  • You need to add the TCP/IP protocol back to your computer and then reapply SP2. But remember to click NO after adding TCP/IP but before rebooting the system.
  • If the above workaround doesn’t work then try doing the one mentioned below.
  • Disable RAS configuration after adding the TCP/IP protocol. Once you disable the configuration, you need to reboot the Windows NT computer. Once the system reboots, you need to reapply SP2 and then enable TCP/IP through RAS.

If none of the workaround tactics works then follow the below-mentioned methods to troubleshoot the error:

Method One

If Windows NT Is on a FAT Partition

If you are using FAT partition on your computer for Windows NT, then you need to boot the PC into another operating system such as MS-DOS, MS Windows 95 or another compatible Windows version. After that, you need to replace the Tcpip.sys file in the \Winnt\System32\Drivers folder with the one from SP2.

Method Two

If Windows NT Is on an NTFS Partition

If you are using NTFS partition for installing Windows NT, then you need to install a parallel copy of Windows NT 4.0 but in a different directory. Like you did in step one, you need to replace the Tcpip.sys file with the one from Service Pack 2. Now you need to reboot your PC to the original Windows NT installation. Now reapply Service Pack 2. You shouldn’t forget to delete the parallel Windows NT 4.0 installation, once you successfully apply SP2.

Conclusion

In the most of the cases, the above mentioned troubleshooting steps help you fix the error. But taking it for granted is not logical since there might be some other trigger of the error. If you continue facing the error, after using the tips mentioned above then you need to contact a professional computer technician for expert computer support.

Can Tech Support Easily Fix The Requested Operation Requires Elevation?

Getting the “The requested operation requires elevation” error on a Windows computer is not surprising. There are various scenarios in which you can come across this error. For instance, the error might occur while using the Windows Command Prompt or the Windows Update Center. In this blog post, you will get information about the intricacies of this error in detail. After that, you will also learn the troubleshooting tips that will help you in fixing the error.

Understanding the Error Technical support, 

Technically, the error “The requested operation requires elevation” is not a very complex error, as it is a simple permission error. The error occurs when you attempt to perform certain Windows operations without appropriate permissions or rights.

You probably know that in Windows, you have one Administrator account and standard user accounts. The Administrator account has special privileges and rights. Certain operations are executable only if you have the Admin rights, also known as privileged rights. Running network commands or making Windows OS modifications are some such operations for which privileged/admin rights are mandatory.

Why Elevation is Necessary for Executing Certain Operations?

Security is the main reason for setting this mandatory bar. Otherwise, any standard user would have been able to change the critical settings and configuration of a computer. Thus from the security perspective, Windows have limited the rights to certain operations to the Administrator only. Before making any important changes in the Windows OS, the user needs to authenticate himself as the Administrator. For that he needs to enter the Administrator login credentials. Then, UAC (User Account Control) identifies your account type, and accordingly permits or restricts you from performing your requested operation.

Computer Support Troubleshooting Tip 1: Run as Administrator

Computer support,

If you login to your computer using the standard user account and then attempt to perform those operations that require privilege operations, then UAC will restrict you with this error. Thus, on receiving this error, there are two simple things you can do to fix the error:

  • Log out from the standard user account and login to your computer with the Administrator account.

If you don’t want to log out from the standard user account, and still want to acquire the admin rights, then perform the following steps:

  • Go to your system’s desktop, and select the program you want to run.
  • Right-click on it, and select ‘Run as Administrator.’
  • Now, type your Administrator login credential and you will get the admin rights for running only that particular program.

Computer Support Troubleshooting Tip 2: Disable UAC

An operation or program that requires elevated rights always has to be run as Administrator, and for that you will always require typing your Administrator login credentials. However, if you are the only user of the computer or share it with only trusted peers, then you can try out a tricky troubleshooting tip. The tip is to disable the UAC. As mentioned above, UAC is responsible for identifying your account type. Thus, if you disable UAC on your computer, then there will be no one to distinguish between if you are an Administrator or a standard user. However, you should disable the UAC, only if you know that your computer is safe and will not get illegitimately accessed. If security is not a concern for you, then you can avoid keeping separate accounts for the Administrator and standard user.

How to Disable UAC?

Tech support,

Disabling the UAC is a bit complicated task. If you are just an average computer user, then it’s better not to self-perform it, rather go for online technical support services. The tech support expert will help you in getting the UAC disabled. However, the process of disabling UAC requires the Admin login credential for once.

The computer support expert will perform the following steps to disable the UAC:

  • Go to ‘Start’ button and click it.
  • Click on ‘Control Panel.’
  • In the search box, type ‘UAC.’
  • Then, click ‘Change User Account Control settings.’
  • Move the slider to the ‘Never notify position,’ to turn off the UAC.
  • Then click ‘OK.’
  • When prompted, type your Administrator password.
  • Now, restart your computer, and UAC will get turned off.

Conclusion

Tech support,

With these steps, the tech support engineer will disable the UAC, and then technically you shouldn’t get the “The requested operation requires elevation” error while executing any operation on Windows. However, disabling the UAC is not a right move from the security perspective. Thus, it is advisable to use the ‘Run as Administrator’ option. In the bottom line, you can’t fix this error without using the Administrator login credential. And if you have the Admin login credential, then fixing this error is not an issue.

Technical Support Troubleshooting Tips to Fix the Error “The Requested Operation Requires Elevation”

Windows is certainly one of the best computing platforms. But it is also true that over Windows platform, you can easily come across an error. Corrupted Windows Registry, overcrowded registry entries, malware, viruses, permission issues and many other causes lead to different types of errors. ‘The requested operation requires elevation’ is a common Windows error that crops up when you use the command prompt.

If you are struggling with this error, then this blog will help you in learning some useful computer support tips that will help you in getting rid of the error.

Understanding the Errorcommand prompt

Before you learn the tips, it is imperative for you to understand the cause of the error. The error is a permission error. It occurs while you use the Windows command prompt. Over the Windows environment, there are certain commands that are executable only from the elevated command prompt. If you try executing these commands from the standard command prompt, then will get restricted with the error ‘the requested operation requires elevation.’

The error clearly signifies that you need to elevate your account type of command prompt to run the request on command or operation. Thus, if you are log in from a standard user account, then your command prompt will not have the administrative privileges. To get the admin rights, you need to log in with your Administrator’s account.Technical Support

Thus, to use the elevated command prompt, it is essential that you should have Administrator’s login credentials. It is not essential that you have to log out from your standard user account, and then log into your Administrator account. Even if you are using the standard user account, you can launch the elevated command prompt. However, even to do that you need to have the Administrator’s password.

Following are some of the useful computer support tips that will help you in launching the elevated command prompt:

Technical Support Tip 1: Run as Administrator from Shortcut

  • Click the ‘Start’ menu
  • Select ‘All Programs.’
  • Then type ‘Accessories.’
  • You should be able to see shortcut labeled ‘Command Prompt.’
  • Right-click on it.
  • Next, select ‘Run as Administrator.’
  • Next, a ‘User Account Control’ prompt will appear.
  • Here, you need to click ‘Yes’ so that the Command Prompt can make changes on your computer.
  • That will open the ‘Elevated Command Prompt’ as shown below:


Technical Support Tip 2: Use ‘Ctrl+Shift+Enter’ to launch Cmd.exe

  • Click on the ‘Start’ menu
  • In the search field, type cmd
  • Then press the ‘Ctrl+Shift+Enter’ keys on your keyboard
  • It will open a prompt of ‘User Account Control’ asking your consent
  • Then, click the ‘Yes’ button to launch the Elevated Command Prompt

Technical Support Tip 3: Create a Shortcut for Elevated Command Prompt

Tech support

If you require using the elevated command prompt often, then you can try this easier way of launching it. The quickest way to access the elevated command prompt is to create a shortcut on your desktop. To create the shortcut, perform the following steps:

  • Click on the ‘Start’ menu.
  • Then, select ‘All Programs.’
  • Next, select ‘Accessories.’
  • Here, you will see a shortcut labeled ‘Command Prompt.’
  • Right-click on it, copy it and paste it
  • Then, select ‘Pin to Taskbar.’
  • That will create the shortcut for Command Prompt.
  • Right-click on it.
  • Then, select ‘Properties.’
  • In the properties screen, click the ‘Shortcut’ tab.
  • Then, click the ‘Advanced’ button.
  • That will open the following screen.
  • Here, tick the box labeled ‘Run as administrator.’
  • Then, click the ‘OK’ button.
  • Click ‘OK’ button one more time to exit from the shortcut’s properties.
  • Now, whenever you need to use the shortcut, just double-click on it
  • It will automatically run the elevated Command Prompt.

Conclusion

With these computer support tips, you have learned how to run the elevated command prompt so that you can run your commands without facing the error ‘the Requested operation requires elevation.’ You can get rid of the error, even by disabling the UAC (User Account Control.) But, keeping it disabled is not a good idea from security’s perspective. Thus, whenever you receive the referred error, it is better to use the elevated command prompt by using the tech support tips mentioned above.

Advanced Computer Support Tips to Troubleshoot 0x00000050 Windows Error

The majority of users face Windows problems while using Microsoft operating system. Poor computer maintenance, compromise with security arrangements, and installation of malicious software or programs can lead to a variety of errors. These errors are steadfast and don’t get resolved easily instead users need to look for expert computer support for the getting errors fixed. One of such fatal errors is 0x00000050 that can immediately halt your productivity and you get prevented from performing any activity using your computer. In this blog post, we will discuss and share expert technical support tips to fix the error.computer support

The blog will elaborate tips that you can use to fix the issue that you can face with your Windows PC. Once the error takes place, you get a blue screen error / BSOD / Stop error that appears as / BSOD / 0x00000050 (PAGE_FAULT_IN_NON_PAGED_AREA with the error code 0x00000050. There might be different opinion and cases about why the error takes place. Only a computer support or technical support can tell precisely the reason behind the error. Some of the explanations suggest that the error might be a result of a recent update on your PC, or it may occur when you install or update an antivirus of the security program. You face the error also because of problems with display driver or a third-party search tool.

How to Resolve the Error?

Below discussed are two most effective troubleshooting techniques to fix the error. Let us go through that one-by-one. The tips mentioned below are relevant if you have recently installed an antivirus or a security program on your PC. It is relevant also if you started facing the error right after you updated the security program.

Method One:

  • First of all, boot your PC in ‘Safe Mode.’ To start your PC in Safe Mode, you need to press F8 at the system startup and then you will get the BIOS post display on which you need to select Safe Mode.
  • Keep the activation information of the antivirus program handy. You need to uninstall the software by going to Control Panel >> Add or Remove programs (Windows XP) or Programs or Programs and features in case of Windows Vista, 7.
  • Now you need to restart your computer to make sure that Windows starts up normally.
  • Now go to Windows Update through Control Panel.
  • Restart the computer once you successfully update your computer.
  • Now you need to install the antivirus/security program again.

If the error is getting initiated by a malicious or outdated security program, then the above steps will help you identify and then resolve the error.

Method 2:

In the second method, you will learn how to update the display adapter drivers. It is important because an outdated or incompatible driver may lead to the 0x00000050 error.

  • Follow the steps mentioned above to boot into the Safe Mode.
  • Lets move to Device Manager in Control Panel.
  • Expand the Display Adapter section.
  • Expand the Display Adapters section.
  • Next, you need to right-click the listed device.
  • Then, click on uninstall.
  • Now you need to restart your computer once again in Safe Mode.
  • Go to Device Manager and click on the ‘Scan for hardware changes’ button.
  • Now the display driver will get installed automatically.
  • Next, you have to restart your computer in normal mode.Device Manager

Now connect your PC to the Internet and download and install the latest available display drivers from the OEM website. You can search and find the most suitable driver from the site by referring the model or version of your device. Ensure that the device driver you download is compatible with the device you are using. Once you install the updated and compatible device driver, the problem should get over.

The tips mentioned above are alright and useful if you have a sound knowledge about computer software and hardware components. Things may turn complicated and difficult to execute if you are a basic or novice user. It is advisable that don’t go for using these tips if you lack knowledge about PCs. One wrong step can lead to many disastrous situations such as deletion of critical system files and folders and inappropriate modifications in the PC settings that can ruin your PC miserably. The ideal way is to choose an expert through technical support service and get your PC fixed.

Conclusion

As evident from the above discussion, the 0x00000050 error is a fatal error that can ruin your pleasant PC experience. As a user, you don’t have many options to do but one thing that you must do is to troubleshoot the error as early as possible to prevent further damages. You should apply the regular computer maintenance tips so that that you can stop security threats and other malicious agents before they hit your PC.

Advanced Troubleshooting Steps to Fix 0x00000050 Windows Error in Windows XP

An error with your Windows PC leaves you annoyed because it interrupts your all online and offline activities that you do using your PC. The problem becomes huge for those who are not well-versed with computer parts including software and hardware. Once they see the problem, they get on their toes without any clue about how to fix it. If you are one of those and looking for a quick technical support, then you can surely rely on services offered by many computer support firms. Your PC starts creating issues especially when you keep using it for long without adequate care. To ensure that your PC keeps running well you must go for periodic laptop service that ensures that your PC is optimized, software updated, and hardware in optimum condition.

0x00000050Gone are the days, when you had to wait in queues to get your PC fixed. Today, you get multiple computer support options for quick PC troubleshooting. With the advent of blazingly fast Internet and evolved remote Internet connectivity, getting your PC fixed is no more a tricky affair. You simply need to call a toll-free number, and you will get connected to a live and certified PC expert. Getting your PC fixed through online technical support is an ideal option because everything takes place in your virtual presence. The technician updates you with all the activities that he undertakes on your PC. In case of doubt or any query, you can ask the technician and he will promptly reply.

It is the usual tendency of PC users that they first try troubleshooting themselves. If the issue is minor that may relate to updating installation, optimization of similar processes, then such users get successful as well. If you are one of those and confident enough that you can fix your PC with a bit of guideline, then you are reading the right blog.

In this blog, you are going to get very useful information regarding how to troubleshoot 0x00000050 errors. Read below to know the symptoms, causes and troubleshooting steps to fix the error.

Symptoms

  • The “PAGE_FAULT_IN_NONPAGED_AREA” with hexadecimal 0x00000050 appears and then crashes the active program window.
  • You will see the error message – “STOP Error 0x50: PAGE_FAULT_IN_NONPAGED_AREA.”
  • A problem has been detected, and Windows has been shut down to prevent damage to your computer. The problem seems to be caused by the following file:
  • Once the error takes place, your PC will frequently keep crashing with the 0x00000050 error message.
  • “The PAGE_FAULT_IN_NONPAGED_AREA bug check carries a value of 0x00000050. It also indicates towards an invalid system memory.
  • Windows starts running slow with minimum reaction to mouse or keyboard input.

In the majority of the cases, users face this blue screen error when they install new hardware or software. Such errors may appear during program installation, driver installation or Windows startup or shutdown. It would be easy to diagnose and troubleshoot the issue if you keep a track of when and where these STOP errors occur.

Causes of the Error

computer supportThere might be many causes for an error. Similarly, there are many causes of the 0x50 as well. Find below the list of causes that may trigger the issue:

  • Corrupt or incorrectly configured device drivers.
  • Corruption of Windows registry from a software install or uninstall.
  • Virus or malware infection that might corrupt Windows system files or Windows OS.
  • Driver incompatibility particularly when you install new hardware.
  • Damaged or removed system files after you install software or drivers about Windows OS.
  • Damaged hard drive.
  • Corrupt memory (RAM).
  • Some other issue related to hardware, firmware, driver or software.

Easy Troubleshooting Tips

  • First of all, repair registry entries about the 0x00000050 error.
  • Complete scan of the PC for viruses and malware.
  • Use Disk Cleanup tool to clean your PC from system junk including temporary files and folders.
  • Update your PC device drivers.
  • You can also use Windows System Restore utility to undo recent system changes.
  • Uninstall and reinstall the Windows OS program related to the error.
  • Run Windows System file checker.
  • Install all available Windows updates.
  • Check for hard drive corruption (“chkdsk /f”).
  • Check RAM for corruption.
  • Perform a clean Windows installation.

Conclusion

A computer error takes place because of numerous causes and sometimes it gets tricky to diagnose the exact cause. You need to carry a sound troubleshooting experience to find out the main reason behind the error. Therefore, if the steps mentioned above don’t work out then consider calling professional technical support service provider. In the meantime, you shouldn’t skip laptop service sessions to keep your PC optimized and performing like new.